

1
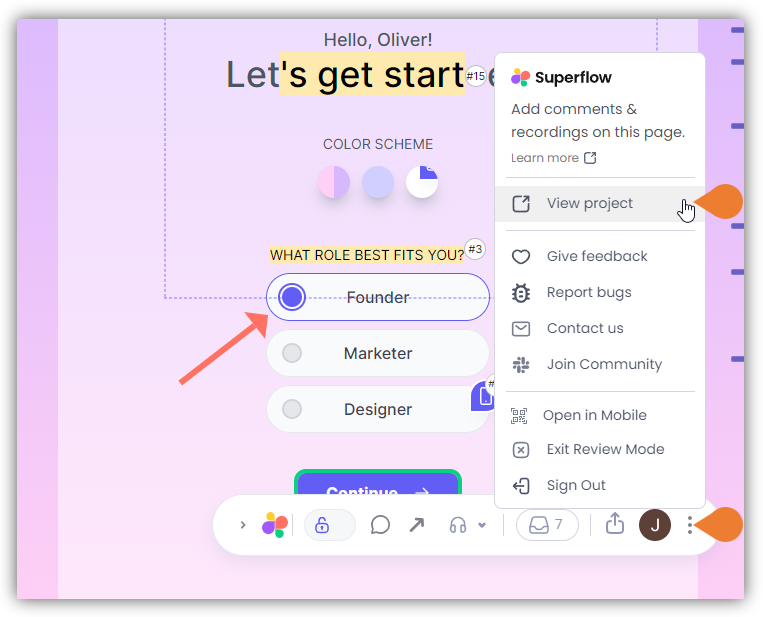
Find the Superflow Toolbar and click the More Options icon
2
A sub-menu will expand, click the View Project option to select
3
A new tab will direct you to the Project Dashboard page
4
By default, when accessing the Project Dashboard…
By default, when accessing the Project Dashboard, you will be directed to the Dashboard for Comment Status screen. To access the Projects list, click < Back or the WEBSITES module.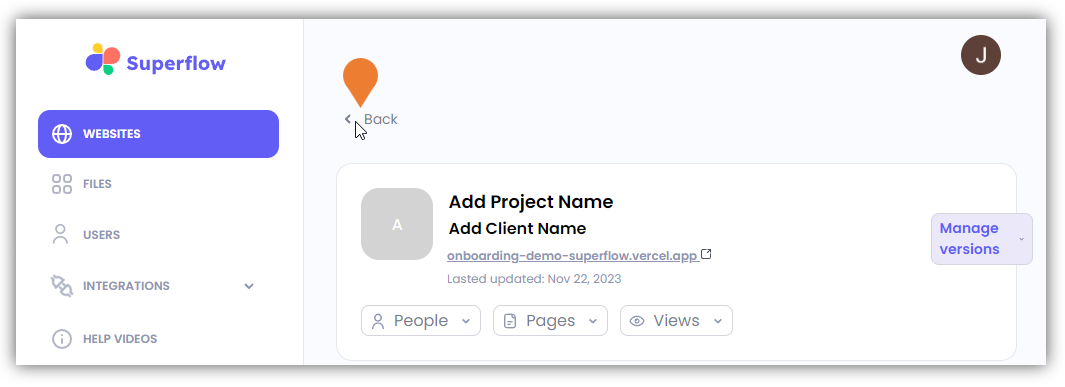
5
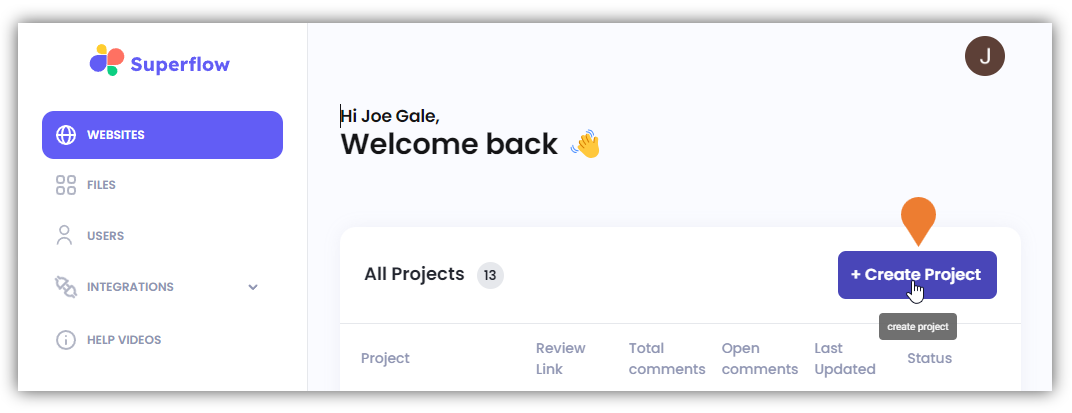
Click the + Create Project button
6
You will be directed to the Create new project page
Specify the required information.
7
In the Choose a platform to install Superflow section, click the drop-down arrow…
In the Choose a platform to install Superflow section, click the drop-down arrow, select the appropriate platform, and click Next.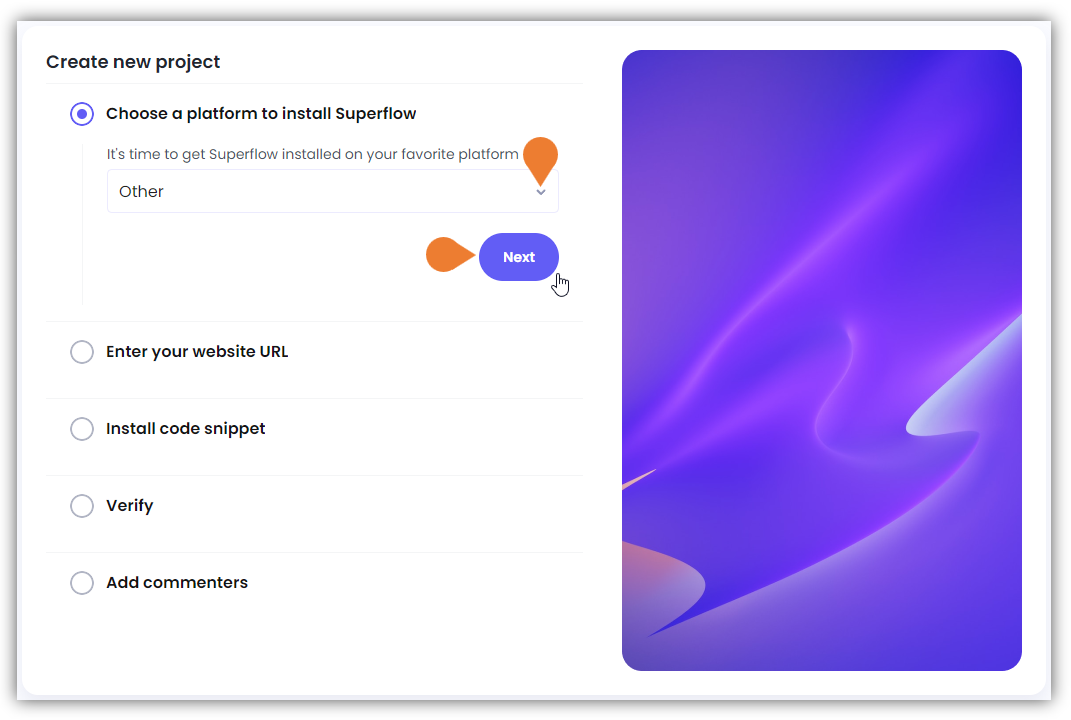
8
In the Where do you want to install Superflow section, enter the staging or production URL…
In the Where do you want to install Superflow section, enter the staging or production URL, and click Next.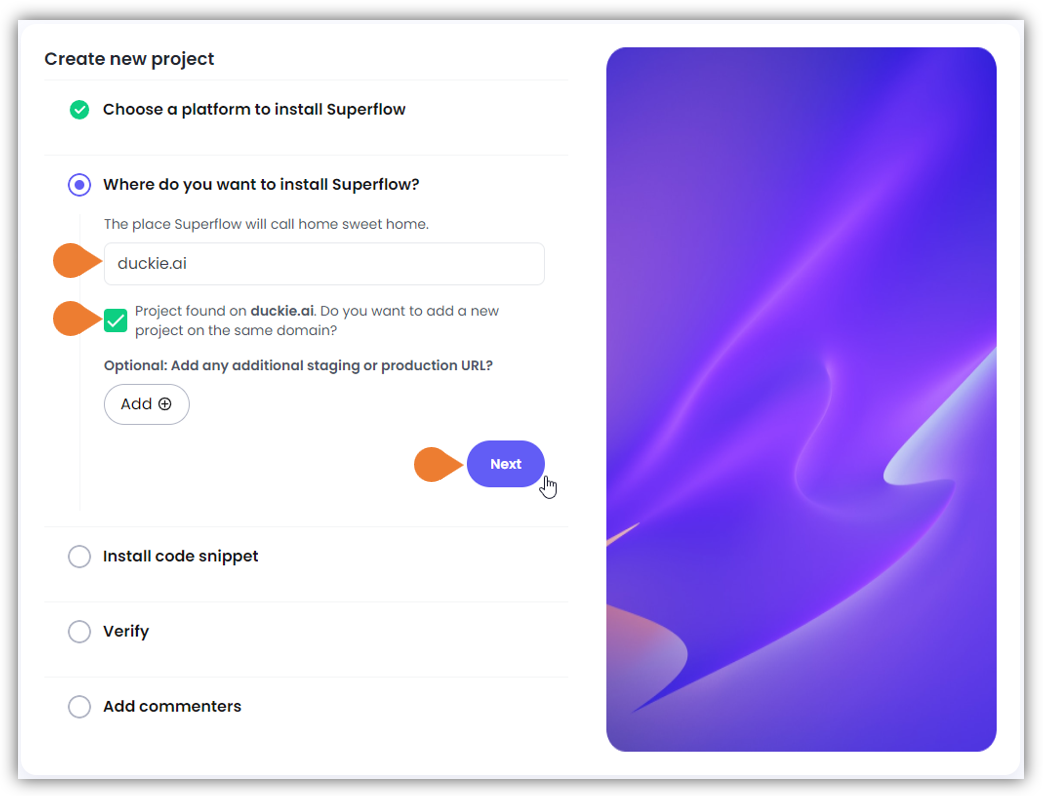
you can add multiple URLs using the Add + button.
9
In the Install Code Snippet section…
In the Install Code Snippet section, copy the snippet using the Copy icon and paste it on your website. Click Next to continue.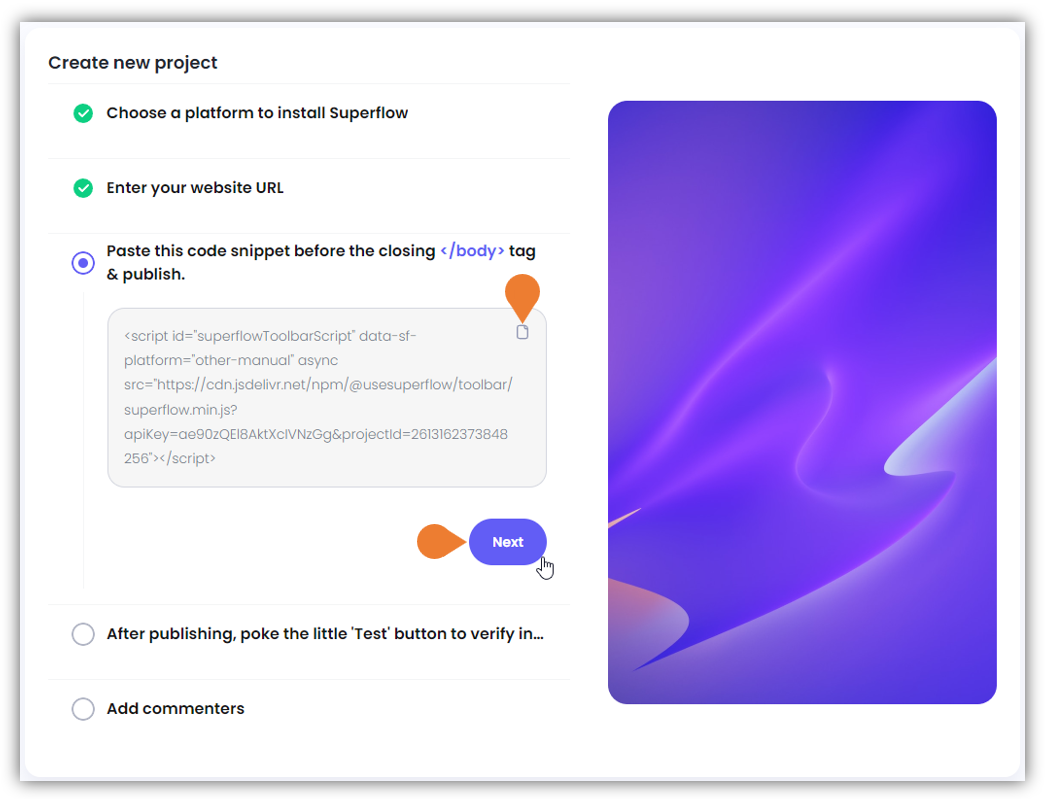
10
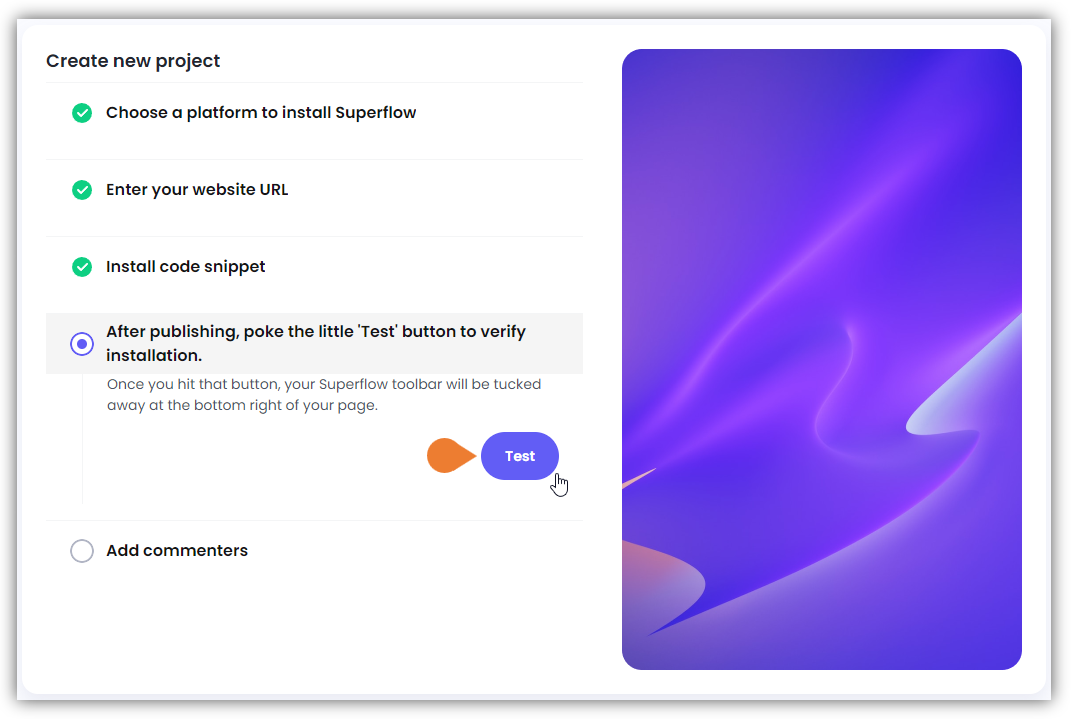
In the Verify section, click the Test button to verify the installation
11
A new window/tab will open indicating that the snippet was installed successfully, click Next

12
Once the testing stage is completed…
Once the testing stage is completed, you will be directed to the Add Guest Users section to add Guest users to your new project.